NeoForge
 Forge
O modzie KubeJS Curios
Curios integration for KubeJS
Use this mod, you can:

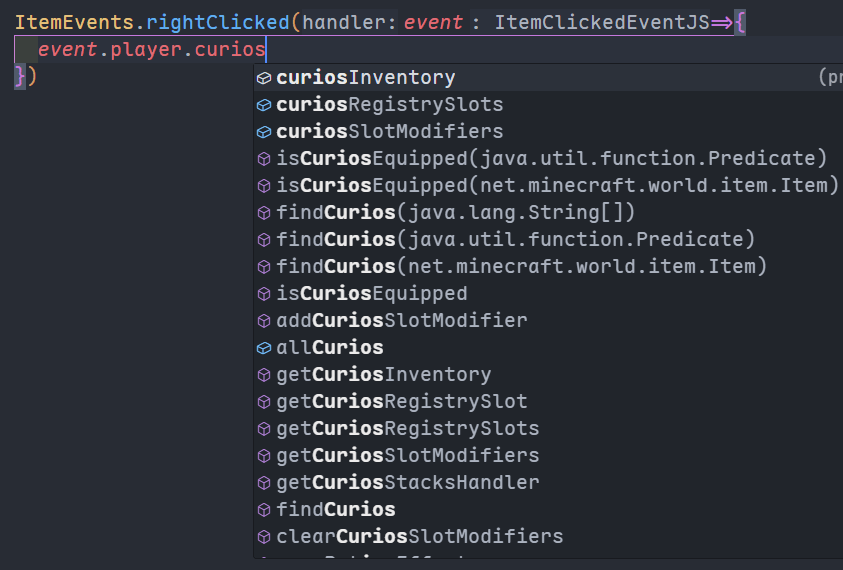
1.Get CuriosHelper from LivingEntity
2.Create Custom Curios
3.Add Curios capabilities to items
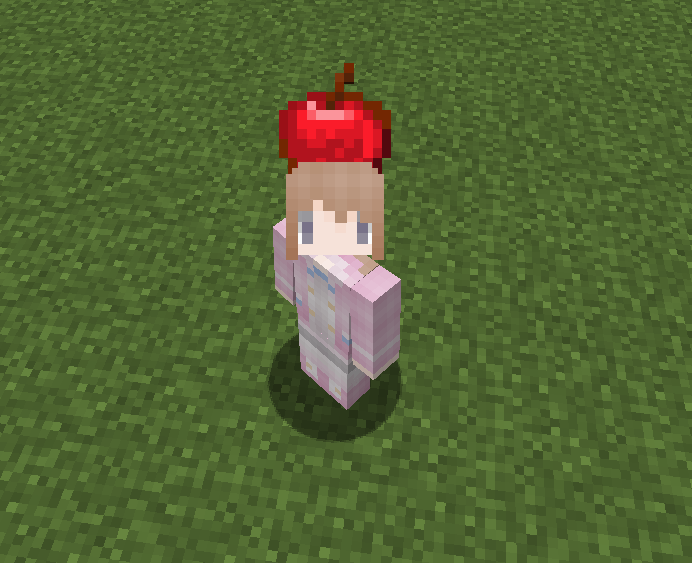
4.Register or remove Curios render
5.Add CuriosJS Events
LivingEntity Curios Helper
Registry Curios & Item Modify (Startup)
StartupEvents.registry('item', event => { event.create('test') .attachCuriosCapability( CuriosJSCapabilityBuilder.create() .curioTick((slotContext, stack) => { }) .onEquip((slotContext, oldStack, newStack) => { }) .onUnequip((slotContext, oldStack, newStack) => { }) .canEquip((slotContext, stack) => true) .canUnequip((slotContext, stack) => true) .modifySlotsTooltip((tooltips, stack) => tooltips) .addAttribute( "minecraft:generic.max_health", UUID, 20, 'addition' ) .modifyAttribute(attributeModificationContext => { let { slotContext, UUID, stack, modifiers } = attributeModificationContext attributeModificationContext.modify( "minecraft:generic.armor", "identifier", 20, 'addition' ) }) .canDrop((slotContext, source, lootingLevel, recentlyHit, stack) => true) .modifyAttributesTooltip((tooltips, stack) => tooltips) .modifyFortuneLevel((slotContext, lootContext, stack) => 0) .modifyLootingLevel((slotContext, source, target, baseLooting, stack) => 0) .makesPiglinsNeutral((slotContext, stack) => false) .canWalkOnPowderedSnow((slotContext, stack) => false) .isEnderMask((slotContext, enderMan, stack) => false) ) .maxStackSize(1) .tag("curios:head") }) ItemEvents.modification(event => { event.modify('apple', item => { item.attachCuriosCapability( CuriosJSCapabilityBuilder.create() .curioTick((slotContext, stack) => { }) .onEquip((slotContext, oldStack, newStack) => { }) .onUnequip((slotContext, oldStack, newStack) => { }) .canEquip((slotContext, stack) => true) .canUnequip((slotContext, stack) => true) .modifySlotsTooltip((tooltips, stack) => tooltips) .addAttribute( "minecraft:generic.max_health", "identifier", 20, 'addition' ) .modifyAttribute(attributeModificationContext => { let { slotContext, UUID, stack, modifiers } = attributeModificationContext attributeModificationContext.modify( "minecraft:generic.armor", UUID, 20, 'addition' ) }) .canDrop((slotContext, source, lootingLevel, recentlyHit, stack) => true) .modifyAttributesTooltip((tooltips, stack) => tooltips) .modifyFortuneLevel((slotContext, lootContext, stack) => 0) .modifyLootingLevel((slotContext, source, target, baseLooting, stack) => 0) .makesPiglinsNeutral((slotContext, stack) => false) .canWalkOnPowderedSnow((slotContext, stack) => false) .isEnderMask((slotContext, enderMan, stack) => false) ) }) })
Render (Client)
CuriosJSEvents.registerRenderer(event => { // remove curios render event.remove('test') // register curios render event.register( 'apple', context => { let { stack, slotContext, matrixStack, renderLayerParent, renderTypeBuffer, light, limbSwing, limbSwingAmount, partialTicks, ageInTicks, netHeadYaw, headPitch } = context let { modelManager } = Client let entity = slotContext.entity() let model = modelManager.getModel(new ModelResourceLocation(stack.id, 'inventory')) matrixStack.pushPose() CuriosRenderer.translateIfSneaking(matrixStack, entity) matrixStack.mulPose(new Quaternionf().rotateZ(JavaMath.toRadians(180))) matrixStack.mulPose(RotationAxis.YP.deg(-netHeadYaw)) matrixStack.mulPose(RotationAxis.XP.deg(-headPitch)) Client.itemRenderer.render( stack, 'head', false, matrixStack, renderTypeBuffer, light, OverlayTexture.NO_OVERLAY, model ) matrixStack.popPose() } ) })
Jak zainstalować KubeJS Curios
With Millida Launcher
Install Millida Launcher
The launcher is free: download it at millida.net/launcher and sign in with any nickname.
Click “Install” on this page
The launcher opens and installs the mod for Minecraft 1.20.1–1.21.1 on Forge or NeoForge automatically.
Launch the game
A profile with it appears in the launcher: click “Play”.
Manually
Install Forge or NeoForge
The loader must match the game version of the mod file, for example Minecraft 1.21.1. After installing it, a separate profile appears in your launcher.
Download the file for your version
In the version list above, pick the file kubejs_curios_neoforge_1.21.1-1.0.4.jar (40 KB) for your game version and loader.
Put it in the mods folder
The folder is inside .minecraft (Windows: %appdata%\.minecraft\mods). If it does not exist, create it.
Launch the loader profile
Open “Mods” in the main menu: KubeJS Curios should be in the list.
Minecraft 1.21.1 runs on Java 21: with a different Java version the game may close right after launch.
Wersje
Z zależnościami
| Minecraft | Loader | Plik | Data | Akcje |
|---|---|---|---|---|
| 1.21.1 | NeoForge | kubejs_curios_neoforge_1.21.1-1.0.4.jar40.2 KB 1 | ||
| 1.20.1 | Forge | kubejs_curios_forge_1.20.1-1.0.4.jar41.3 KB |
FAQ
Which Minecraft versions does KubeJS Curios work on?
There are files for 1.21.1, 1.20.1. The newest is 1.21.1.
Is KubeJS Curios for Forge or Fabric?
There are files for Forge: 1.20.1 and for NeoForge: 1.21.1. There are no files for Fabric: a mod for another loader will not start.
Does KubeJS Curios need other mods?
The author lists no required dependencies: the Forge or NeoForge loader is enough.
Which Java does KubeJS Curios need?
Minecraft 1.21.1 runs on Java 21. If the game closes right after launch, the usual cause is the wrong Java version in the profile settings.
Where can I download KubeJS Curios safely?
On this page: the file kubejs_curios_neoforge_1.21.1-1.0.4.jar (40 KB) is stored on Millida’s server, with no link shorteners. SHA-1 checksum: d76c4181e1436bc85f108c7191f1ed7ee374d318.
Opinie
Oceń KubeJS Curios jako pierwszy